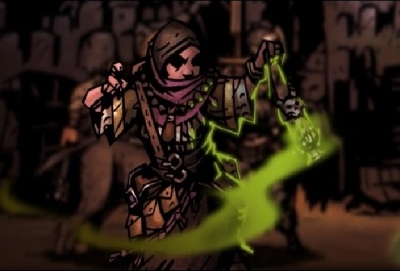
You know that Darkest Dungeon is a quite challenging game where heroes die permanently. Considering this, you probably will hire new heroes and make new parties for every mission.
For a successful team you need a balanced squad with healing, damaging and controlling skills. Healers are usually located in the fourth slot and damagers occupy the first slot. You can place other damagers, controllers or supporters at the second and third slots. That’s a universal formation which suites every dungeon, but often you want to build an unusual team.
We will start with basics and continue with several examples of unusual parties. Standard and balanced team formations you also can find in another article named «Darkest Dungeon: Best Party».
What you should know about party building
Here are a few principles which determine the gameplay:
- The best combination depends on certain dungeon and mission. There are detailed guides for each dungeon in the listed above article.
- There aren’t any perfect builds. The game always tries to rearrange your formation, to stun your damagers and to destroy your order. You just can minimize this influence of AI.
- Keep in mind quirks and diseases of each hero when building a new team. Some quirks may reduce the team’s effectiveness while others can boost your heroes.
- Don’t forget to upgrade skills and equipment. Unlock new powerful abilities, level up weapons and armor, use trinkets.
These factors can significantly enhance or weaken your formation. Consider this if you want to create a successful party and finish the game. You should prepare for every mission carefully and balance between provisions, trinkets, quirks, and skills of heroes. Try to minimize cons and combine pros. For example, the Crusader with the Ruins Tactician and the Unholy Hater features will destroy all enemies in the Ruins. Equip trinket with a boost to DMG or HP and you will get a perfect killing machine.
Now let’s discover certain formations which may help you in difficult situations.
Starting party
Slot 1: the Crusader.
Slot 2: the Highwayman.
Slot 3: the Plague Doctor.
Slot 4: the Vestal.
You can build a basic formation for the very first mission. Although, this party is petty effective even after you get access to all classes. Here you have all essential heroes with healing, damaging and controlling abilities. We suggest taking this party in the Ruins where the Crusader deals additional damage to unholy foes.
The Vestal heals all characters and slightly damages enemies.
The Plague Doctor can stun foes and apply status effects such as bleeding or blighting.
The Crusader and the Highwayman are damagers, you can change their positions.
Stunning party
Slot 1: the Hellion.
Slot 2: the Bounty Hunter.
Slot 3: the Bounty Hunter.
Slot 4: the Plague Doctor.
You will not suffer from enemies if they cannot even attack. This party focuses on preventing enemies from attacks at all. All heroes can both stun foes and damage them. First of all, you should stun as much as possible enemies at the beginning of each round. Then attack stunned monsters and apply new stuns. Repeat till win.
The Plague Doctor should use Blinding Gas and Disorienting Blast permanently.
The Bounty Hunters can stun enemies with Flashbang and attack them with Finish Him.
The Hellion also may stun foes with Barbaric Yawp, but we suggest dealing damage with Breakthrough and Wicked Hack.
Bleeding party
Slot 1: the Hellion.
Slot 2: the Hellion.
Slot 3: the Occultist.
Slot 4: the Houndmaster.
Build this party to finish the Weald, the Warrens, and the Courtyard. All heroes here focus on bleeding skills which deal damage every round. Bleeding is very effective against foes with high PROT as this stat doesn’t protect from status effects. You also can use this formation against weak monsters as the Hellions still have good DMG.
The Hellions should apply If It Bleed skill as often as possible.
The Occultist can heal all teammates, but this skill can inflict bleeding.
The Houndmaster also should apply bleeding with Hound’s Harry ability.
Abomination party
Slot 1: the Abomination.
Slot 2: the Abomination.
Slot 3: the Houndmaster.
Slot 4: the Houndmaster.
It’s a quite unusual formation with only two classes. We will use a potential of the Abomination’s beast form. Remember that this hero increases the stress of teammates when transforming. Here the Houndmaster comes into play with stress-reducing skills. You even don’t need healers as the Abomination can heal himself.
The Abominations will deal high damage and recover health with Absolution skill.
The Houndmasters will reduce stress with Cry Havoc skill and support damagers.
Point Blank Shot party
Slot 1: the Highwayman.
Slot 2: the Highwayman.
Slot 3: the Occultist.
Slot 4: the Vestal.
Here we will focus on Point Blank Shot ability of the Highwayman. As long as you can use this skill only on the first slot enemies’ formation, you have to pull foes there. Use the Occultist for that purpose. You can also replace the Vestal with the Plague Doctor to remove corpses after Point Blank Shot was used.
The Highwaymen should only deal damage with their main ability.
The Occultist uses his Daemon’s Pull skill to move an enemy forward.
The Vestal will heal all allies, especially the Highwayman at the first line.
Marking party
Slot 1: the Bounty Hunter.
Slot 2: the Bounty Hunter.
Slot 3: the Arbalest.
Slot 4: the Arbalest.
Build this squad to slay the most powerful and protected enemies such as bosses. Your strategy is to mark enemies and deal damage to these marked targets. It allows you to seriously reduce PROT and increase DMG. You can add here the Houndmaster which has more utility or the Grave Robber which deals huge damage to marked foes.
All heroes here should both mark and damage enemies.


