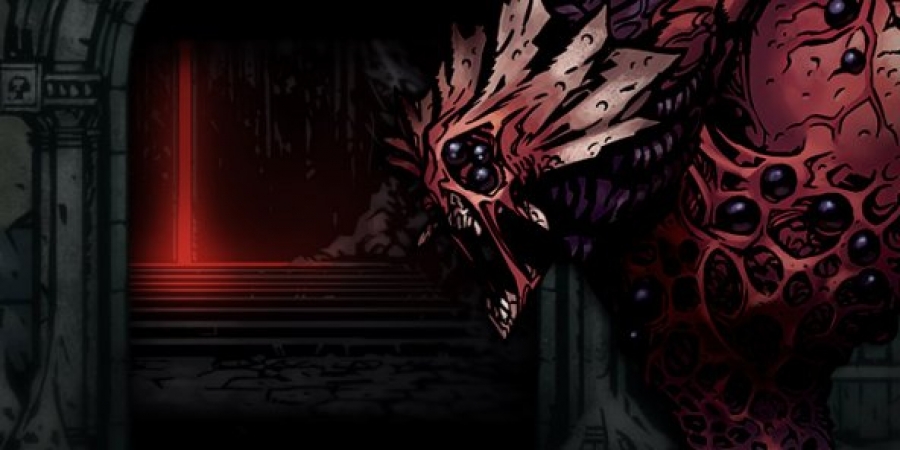
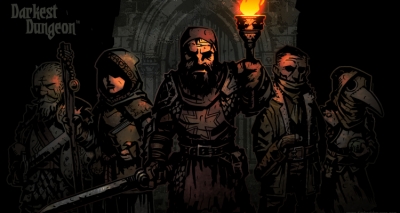
Bosses in the game are big, powerful and deadly dangerous. You have to build a perfect team to defeat them. In this guide, we will describe all bosses, mini-bosses and special bosses from original game and DLC. The last paragraph is dedicated to final bosses and it contains spoilers, so be careful while reading.
The Ruins bosses
- The Necromancer.
It’s the first and one of the easiest bosses. He can damage a frontline, a backline and whole team at once. As the Necromancer is unholy take one or even two Crusaders into the fight. This class has a special bonus when fighting unholy enemies. The Necromancer will constantly spawn skeletons in front of him, so you want heroes with pull skills. Take the Bounty Hunter or the Occultist to control this boss. The Hellion also will be nice as she can stun foes.
Essential classes: the Crusader, the Bounty Hunter/the Occultist, the Hellion.
Tactic: stun the Necromancer and move him forward, then simply damage the boss.
- The Prophet.
It’s the second boss in the Ruins. The Prophet can mark certain slots in your line-up and deal gigantic damage to these positions. He is protected by wooden pews, so you have to destroy barricades to face the Prophet. Also, you can damage him directly with skills which aim back slots. Try to damage the Prophet by bleeding and blighting skills as well as mark him. You can focus this boss with all heroes. Note, that every wooden pew costs 1250 gold!
Essential classes: the Hellion and the Arbalest.
Tactic: cause the Prophet bleed and blight, mark him and damage with direct hits.
The Warrens bosses
- The Swine Prince.
This boss consists of two parts: the Swine Prince itself and Wilbur. The Swine Prince occupies first three slots and attacks all your team. But the most powerful hits he can use only on marked by Wilbur targets. Caution! Do not kill Wilbur, because after his death the Swine Prince will highly damage your team every turn. You have to kill the main boss. It’s easy to kill him as he is vulnerable to all status effects except stun.
Essential classes: no matter, but take one healer – the Vestal or the Occultist.
Tactic: focus on the Swine Prince, cause him bleed and do not aim Wilbur!
- The Flesh.
It’s an unusual boss that includes four elements with one mutual health for all. The Head of this boss damages your team, the Bone can stun them, the Heart heals the boss and the Butt causes blight. Each part has its own stats. You may attack all slots, but it’s better to focus on weak parts. Try to attack the Heart as often as possible. Then destroy the Butt, after that the Head. The Bone has huge PROT, so attack this part at last.
Essential classes: no matter, but you can take the Houndmaster, the Jester, and the Plague Doctor.
Tactic: attack in order: the Heart > the Butt > the Head > the Bone. You also may damage the Flesh at all with bleed and blight.
The Weald bosses
- The Hag.
This boss also consists of two parts. The Hag itself is a witch who occupies two back slots, can damage all heroes at once and place them into the Por. Actually, the Pot is located at two front slots. This item receives only one point of damage from any attack, so do not focus it. Concentrate on the Hag. We suggest you take several heroes who can damage back slots and one healer to save teammates near the Death’s Door after the Pot.
Essential classes: the Bounty Hunter, the Hellion and the Vestal or the Occultist.
Tactic: ignore heroes at the Pot and damage the Hag, for example, with bleeding skills.
- The Brigand Punder.
The giant cannon summons bandits and the Brigand Matchman. The Brigand Pounder itself has a huge amount of HP and armor as well as resistance to all debuffs. So you should focus the Brigand Matchman and try to stun him. The most powerful attack of this boss depends on the live bandit behind the gun. You should just slay all minions and then deal damage to the boss.
Essential classes: the Houndmaster and the Shieldbreaker.
Tactic: immobilize and attack the Brigand Matchman at first, then damage the gun.
The Cove bosses
- The Siren.
This boss is quite nasty, because she can steal your teammates and force them to fight against your team! In this case, try to stun the Siren as fast as possible and prevent this steal. The boss also will summon minions, but you should ignore them as well as a charmed hero. Focus on the Siren itself and damage her. She has good bleed resistance, so inflict blight. We suggest also taking characters which can damage every slot.
Essential classes: no matter, but be sure your team deals enough damage.
Tactic: ignore everyone except the Siren, damage her and inflict blight.
- The Drowned Crew.
It’s a pretty annoying boss which can immobilize one of your heroes. The Drowned Crew can summon the Drowned Anchorman which stuns your character, raises his stress and heals the boss. Kill this minion as fast as you can and deal damage to the boss itself. You can try to stun the Drowned Anchorman or dodge his attack. Remember that it’s easier to kill this minion when your adventurer is immobilized.
Essential classes: the Crusader and the Plague Doctor.
Tactic: slay the Drowned Anchorman and blight the Drowned Crew.
The Courtyard bosses
- The Baron.
This boss form the DLC likes to hide inside eggs. That means you should destroy several eggs just to find the Baron. You should check all eggs as fast as possible and start damaging the boss. Inflict bleed and mark the Baron to deal maximum damage. Also, you can drive your heroes in bloodlust mode to deal additional damage.
Essential classes: the Occultist, the Man-at-Arms and the Houndmaster.
Tactic: destroy all eggs with AoE and attack the boss with bleeding skills.
- The Viscount.
It’s a pretty weak boss which has low health. Although, he can move between slots and hit your heroes. It’s a good idea to take characters which can damage all slots. Use trinkets to boost your damage and activate bloodlust. Don’t forget about stunning and bleeding skills which can kill the Viscount effectively.
Essential classes: the Abomination and the Houndmaster.
Tactic: try to find the Mercurial Slave trinket and damage the boss directly.
- The Countess.
It’s the toughest enemy in the DLC. The Countess has 400 health and good resistance to almost all status effects and skills. Use the Bolster ability and take heroes with bleeding skills. Increase your damage with trinkets, but don’t forget about DODGE to minimize the Countess’s damage. Use our recommended squad to kill this boss.
Essential classes: the Man-at-Arms, the Grave Robber and the Flagellant.
Tactic: try to dodge her attacks and permanently use the Bolster skill.
- The Garden Guardian.
Here we have a just optional boss, but he is a serious enemy. You can attack the Garden Guardian after completing another quest of DLC. You also can slay this boss multiple times. The Garden Guardian consists of three parts: the boss itself, the Blood Fount and the Stone Shield. You shouldn’t attack the shield because it will trigger devastating attacks from the boss. Just wait until the shield is raised and focus in the main part of the boss. You can also destroy the Blood Fount of it damages too much. When the shield is lowered you should heal and buff your party.
Essential classes: the Arbalest, the Houndmaster, the Bounty Hunter and the Vestal or the Occultist.
Tactic: attack the boss when his shield is raised and buff your PROT, DMG, and CRIT.
Special bosses
- The Brigand Vuulf.
It’s a town event boss. You can unlock it during the «Wolves at the Door» mission. The Brigand Vuulf throws powerful bombs each turn and can summon bandits. You may attack only the boss or try to clear battleground with AoE and control effects. Try to destroy the Barrel O’ Bombs and then kill the Brigand Vuulf.
Essential classes: the Man-at-Arms, the Abomination, the Jester and any healer.
Tactic: deal damage to the Vuulf or try to destroy his minions, do not forget to heal mates.
- The Shrieker.
This boss will appear after you lose 8 trinkets by heroes’ deaths or during special town event. You can find him in the Weald. The Shrieker has one powerful bleeding attack and insane DODGE. So destroy his nest and reduce the Shrieker’s. DODGE with skills. We have one more tip: the nest is immune to all DoT effects and debuffs, so just damage it.
Essential classes: the Man-at-Arms, the Arbalest, the Occultist.
Tactic: focus on the Shrieker’s nest to get treasures and gold.
Mini-bosses
- The Shambler.
Developers claim that the Shambler is the hardest enemy in the game. You can encounter him in the middle of any mission with zero light level. Also, you can summon it by using a torch on the Shambler’s Altar. This mini-boss summons minions and damages your party. So the best strategy is to slay small monsters and stun the Shambler. We strictly recommend preparing for this battle as carefully as possible.
Essential classes: no matter, but take at least one healer.
Tactic: kill minions and stun the boss permanently.
- The Collector.
It’s one of the weakest mini-bosses in the game. The Collector is vulnerable to stun, so use this feature! You have to stun the boss before he summons small minions. The Collector can call bandits with bleeding attacks and vestals with healing abilities. This boss also likes to move between slots and use different attacks. Be sure that you can hit the Collector at every slot.
Essential classes: no matter, but take at least one control class.
Tactic: stun this boss as fast as possible and don’t let him summon minions.
- The Fanatic.
This mini-boss appears only when DLC is installed. You will face the Fanatic if you have cursed heroes. Party with four cursed characters has the highest chance to meet the Fanatic. The boss is similar to the Hag as he can immobilize one hero on a pyre. It’s not so hard to kill the Fanatic. You only need to use many bleeding skills.
Essential classes: the Flagellant, the Jester, the Hellion and the Houndmaster.
Tactic: don’t forget that you have one hero disabled and use bleeding skills.
- The Crocodilian.
Some players claim that the Crocodilian is a real boss, but we think that he is just mini-boss. You will face that monster at the start of DLC plot. The Crocodilian starts with three plants in front of him. Ignore these tough minions and try to stun the boss. He has low resistance to stun and bleed. Although, the Crocodilian can heal himself and you shouldn’t let him do it.
Essential classes: no matter, but take heroes with high DODGE.
Tactic: dodge attacks of the boss, stun him and inflict bleed.
The Darkest Dungeon bosses
Beware! That section contains some spoilers!
- The Shuffling Horror.
It’s the first boss of the final mission in the game. He appears with the Cultist Priest and he also can summon other minions. The Shuffling Horror will attack you, inflict bleed and increase stress. The goal is to kill the Cultist Priest at first and then slay all summoned creeps. Attack the boss with bleeding skills and try to control him.
Essential classes: the Bounty Hunter, the Hellion, the Grave Robber.
Tactic: destroy all summoned foes at first and attack the boss with bleeding skills.
- The Heart of Darkness.
Finally, you will face with the Ancestor himself. He will appear in a human form at first and spawns come copies. Defeat these copies and then you can attack the Ancestor. Here you should use universal heroes such as the Highwayman and the Houndmaster. Once you kill the Ancestor he will spawn the Gestating Heart. Kill this harmless creature to see final form – the Heart of Darkness.
Here you should prepare your mind. This boss has a unique ability. When the Heart of Darkness reaches 67% and 33% health you must choose one hero and kill him instantly. Yeah, you have to finish off this boss only with two heroes. So choose wisely and keep alive the best damagers. Damage this boss with all your skills and try to finish the game!
Essential classes: the Highwayman, the Houndmaster and all damagers.
Tactic: against the Ancestor just focus on his copies and ignore other summoned creatures, stun enemies and destroy it. Against the final form sacrifice your healer and support to keep alive damagers and just attack.


