Characters ate the main part of the game. You hire them and build an expedition to explore dungeons. Heroes, means playable characters, are divided into classes which defines their skills and appearance. Depending on abilities you should place characters in different slots of the squad. For example, healers are effective on the fourth slot and damagers should face enemies at the head of the team.
Each class has its own base stats and skills. Also, each hero has different quirks in addition to class features. You can hire new adventurers in the Stage Coach. So let’s discover some essential characteristics of heroes and differences between classes.
Character elements
Besides base stats each character also has a set of persistent elements:
- Quirks. Each hero has its own combination of special traits with good or bad effects. Quirks influence characters’ behavior in the Hamlet and during the expedition. You can delete bad quirks and lock positive ones in the Sanitarium. Each hero can deal with up to 5 good and 5 bad quirks. After receiving new upon finishing a mission or town event another non-locked quirk will disappear.
- Diseases. These only negative traits hero can acquire during expedition or special events. Diseases give some penalties and debuffs so you should cure them as fast as possible. You can do it in the Sanitarium or just at the mission during camping. The Plague Doctor can cure diseases easily. Diseases and stress are your main problems on which you should spend money at the Hamlet.
Along with quirks and diseases, characters are affected by other game features. The main is stress. All heroes accumulate stress during dungeon crawling. The high-stress level applies serious penalties on a hero and even leads to death. Characters get stress from low light level, attacks of monsters, critical strikes, other heroes’ abilities, curious, special events and even more. But you can reduce stress in the Abbey or the Tavern for gold. Not so many options, huh?
High stress or huge damage received lead heroes to death. A dead character will not return from an expedition, but other members of the party can loot his trinkets. There is a feature of all characters called Death’s Door. It activates when hero receiving fatal damage. Neat the Death’s Door character is still alive but significantly weakened. Any additional damage will kill him. You can save an adventurer with healing by ability or food.
Abilities
Let’s move further and discover the main classes of abilities. Each class has its own skills. They are divided into two groups of seven abilities in each. Note that you can activate only four abilities at a time.
- Combat. These skills your characters use in battles. Abilities could damage enemies, heal heroes, reduce stress, move any combatants, apply buffs or debuffs. You can level up each skill in the Guild for gold.
- Camping. These skills are learned through the Survivalist and cannot be upgraded directly. Camping abilities are more valuable than combat ones. You can heal, reduce stress, cure diseases or apply buffs by these skills.
Each hero starts with four combat skills and three camping skills. You can change active abilities between battles.
Review of each class
We prepared for you the ultimate guide for every available class as of Crimson Court DLC. There are 17 classes and each is quite powerful. You can figure out how to build the most effective team with our help.
- The Abomination.
This class is a pretty odd, which can change his form. The Abomination plays a support role in form of human when buffs, heals and decrease the stress of teammates. Also, he can apply debuffs on enemies. In a form of a beast, the Abomination is a great damage dealer. This class can’t be in one squad with the Crusader, the Leper, the Flagellant or the Vestal. He increases stress to the teammates when changing a form. He also can transform only once per a battle. Note that the Abomination has all skills unlocked at the moment of recruiting.
Tips on the class: support/fighter. Place the Abomination at first or second slot. Team up him with classes that can reduce stress. Swap between support and damage roles wisely.
- The Antiquarian.
It’s even not a fighter, but a helper. The Antiquarian has the worst base stats among all the classes. She can buff allies and debuff enemies and she is very good at self-protecting. For example, the Antiquarian can force teammates to defend her with a high bonus. You may want to take this class because of income boost. With the Antiquarian, you can carry up to 500 gold per stack. Also, she can find valuable treasures. The Antiquarian can produce trinkets and supplies during the camping stage.
Tips on the class: support. Place the Antiquarian at fourth slot and protect her. Take 2-3 Antiquarians if you are out of gold.
- The Arbalest.
It’s a good-ranged fighter and secondary healer that can enhance every team. The Arbalest can mark foes and deal more damage to them. She has high CRIT and several utility skills. This class can heal mates during the battle, but we recommend using her healing during the camping. Although, the Arbalest is almost useless at front slots and she even cannot move forward on the formation. Try to get maximum profit form the Arbalest using her mark at first and finishing enemies with powerful shots after that.
Tips on the class: ranged fighter. Place the Arbalest at the fourth slot. Team up with the Bounty Hunter or the Houndmaster to deal huge damage to marked foes. Learn the Blind Fire skill.
- The Bounty Hunter.
It’s a specific class with good damage and not so good armor. We recommend using the Bounty Hunter as a damager and particularly a crowd controller. He can stun and move foes as well as mark them, but he has low damage without marks. The Bounty Hunter deals increased damage to humans. He also has poor HP and DODGE and cannot heal anybody. Use this class if you need a good combination of controlling and damaging. Your tactics should be like that: prepare with marking or stunning and only after that attacking.
Tips on the class: fighter. Place the Bounty Hunter at the second slot. Team up with the Arbalest or the Houndmaster to use marks effectively. Try to shuffle enemies.
- The Crusader.
You will get this class at the start of the game and probably remain it until the end of the game. The Crusader has the best combination of HP and DMG. He is truly tank and damager especially effective in the Ruins where he deals big damage to unholy. The Crusader also has an average healing and can reduce stress. This class is useless at back slots, but he can come back to the head of the squad. During the camping, he can reduce stress and save teammates from the death.
Tips on the class: fighter. Place the Crusader at the first slot. Learn skills to damage several enemies at once and stun them. Be sure to take the Crusader in the Ruins.
- The Grave Robber.
It’s a very versatile class. You literally can place the Grave Robber at any slot and still get profit. She deals good damage and applies debuffs on enemies. She also has the best DODGE and almost the best SPD and CRIT. We recommend using the Grave Robber as a trap disarmer. But be careful in a fight where she can easily ruin your formation due to mobility. The Grave Robber also supports the team by removing diseases for free.
Tips on the class: assassin. Place the Grave Robber at the third or the fourth slot. Team up with the Arbalest to deal more damage to marked foes. Use Lunge as a finisher and combine it with Shadow Fade.
- The Hellion.
It’s a classic fighter which can deal huge damage, make enemies bleed stun them. The Hellion is an interesting alternative to the Crusader at the first slot. She has nice DMG and DODGE, can increase these stats to the maximum. Some skills of the Hellion tire her out decreasing DMG and DODGE as well. This class is cool at a fight, but has no useful camping skills. So it would be the great choice for short expeditions.
Tips on the class: fighter. Place the Hellion at the first slot. Increase your stats and deal more damage. Always monitor exhausting.
- The Highwayman.
Here we have another class with good flexibility. The Highwayman can damage from any slot and to any slot! He has rather powerful AoE skills and can parry attacks. This class also has a quite low HP and DODGE and completely no stunning or healing skills. The Highwayman can reduce stress or apply buffs while a camping, but these skills take all turns of rest. Keep an eye on character’s HP at low levels.
Tips on the class: melee and ranged fighter. Place the Highwayman at the second or the third slot. Team up the Arbalest or the Bounty Hunter to mark enemies. Take the Highwayman if you expect to face different foes.
- The Houndmaster.
This class has nice versatility and can help your team at any position. The Houndmaster focuses on causing bleed and damaging marked enemies. Try to combine his abilities and damage marked bleeding foes. In addition, this class causes additional damage to beasts. The Houndmaster can heal himself or decrease the stress of the group and even guard allies. But you should use his skills wisely as he has average HP and protects mates only for one round.
Tips on the class: ranged fighter/support. Place the Houndmaster at the third or the fourth slot. Team up with the Bounty Hunter to slay marked foes. Keep the Dog Treat for fights with bosses. Use the Houndmaster in the Weald and the Warrens.
- The Jester.
The Jester has the best buffs among all the classes. It is a great character when you have to boost allies’ SPD, CRIT, and ACC. He also can reduce stress and heal mates. There are debuffs and bleeding attacks in his arsenal so you can use him as a damager. The Jester likes to move as he can use skills only at the certain slots. It’s hard to learn how to use his abilities, but try to get it and the Jester will eliminate enemies.
Tips on the class: support. Place the Jester at the second or the third slot. Don’t take him with classes who are dependent on a strict position as he moves often. Keep the Finale for bosses or last enemies.
- The Leper.
This class has the best DMG and HP. You should use it as a frontline fighter and a tank. The Leper can hit several front enemies with a powerful melee attack. He also has a healing skill and can increase stats so you may even exclude the Vestal from the party. Although, the Leper has a tiny ACC. We recommend using trinkets to boost his ACC and SPD. Don’t let the Leper move backward and he will crush your foes.
Tips on the class: fighter. Place the Leper at the first slot. Team up with the Man-at-Arms and prepare trinkets to increase ACC. Use Revenge when you want a guaranteed hit.
- The Man-at-Arms.
Here we have one of team supports. The Man-at-Arms can buff almost every stat of heroes including DODGE, ACC, CRIT, and SPD. He also effectively decreases enemies’ DODGE and SPD. This class has average DMG itself but can move foes. Take the Man-at-Arms when you need more defensive skills instead of damage. It’s also a good idea to include the Man-at-Arms in expedition when you haven’t access to the Crusader or the Leper.
Tips on the class: fighter/support. Place the Man-at-Arms at the first or the second slot. Take him to protect other heroes. Don’t forget to use camping buffs.
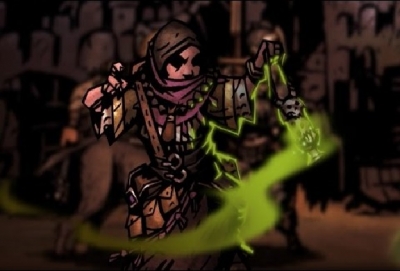
- The Occultist.
It’s an unusual class, which combines control effects and buffs. He has the best heal, but this skill makes allies to bleed. The Occultist also has the best CRIT, but his bas damage is average. This class is good at camping as he can heal and reduce stress, but you must pay for it by lowering a torch level and increasing stress of teammates. You may want to use the Occultist for stunning, moving and debuffing enemies.
Tips on the class: support. Place the Occultist at the third slot. Use his skills very carefully and keep an eye on the balance between pros and cons. Focus on back slots with the Abyssal Artillery.
- The Plague Doctor.
This class is one of the starters. The Plague Doctor knows everything about status effects, buffs, debuffs, and DoT-effects. She can cast bleed and blight on enemies as well as remove these effects from allies. The Plague Doctor also has good stunning and attacking abilities. However, she is vulnerable because she has low HP. Protect the Plague Doctor and let her control enemies with stuns and DoT’s.
Tips on the class: support. Place the Plague Doctor at the third slot. Take this class to the Cove where you will face well-armored foes. Focus on blight damage instead of bleed.
- The Vestal.
It’s the best healer in the game. The Vestal has persistent and powerful heals both for single target and for the whole squad. She can kill enemies and heal herself with one skill. The Vestal’s abilities also can replenish a level of light. This class has low HP and DMG as well as poor mobility. But you can compensate weaknesses by using trinkets. Protect the Vestal similar to the Plague Doctor to get the maximum advantage.
Tips on the class: support. Place the Vestal at the third or the fourth slot. Focus on healing, not on dealing damage. Use this class in the Cove.
- The Flagellant.
This class appears in the Crimson Court DLC. The Flagellant name speaks for itself. This class need wounds and injuries to become stronger. He has a good base HP and SPD, but he can use powerful skills only below 50% HP. The more this class receives damage and stress the better he fights. The Flagellant receives buff at the Death’s Door instead of debuff. His death also buffs allies and stuns enemies.
Tips on the class: fighter. Place the Flagellant at the first or the second slot. Try to control all pros and cons of harming the Flagellant. Kill this hero to boost other characters.
- The Shieldbreaker.
It’s a completely new class of stealth fighter. The Shieldbreaker has low HP and relies on temporary shields which block attacks. Choose this class if you have a good tactics skill and can plan fights properly. The Shieldbreaker can deal big damage to armored foes and save herself in the shadows.
Tips on the class: fighter. Place the Shieldbreaker at the first or the second slot. Use this class against well-armored enemies and deal a huge damage from stealth.
Tips on building team
In conclusion, we offer you some helpful advice on making a successful party:
- Take a damage dealer for the front slot. Here you can choose the Leper, the Hellion, the Highwayman or the Crusader. Try different tactics, for example, buff one fighter or stun foes and eliminate them together.
- Take a healer for the first back slot. You may choose from the Vestal and the Occultist. The first hero is a classic healer with great supporting skills. The second hero is not so ordinary and requires some skill to play.
- Take a ranged fighter for the second back slot. It’s a good idea to focus on back slots of enemies. For that you’ll need ranged fighters or supports. Take the Bounty Hunter or the Occultist and move back enemies forward. Or choose the Plague Doctor and stun them.
You are free to take any hero into the dungeon, but these tips make your team more balanced. For start, try this scheme: the Jester + the Vestal + the Bounty Hunter + the Crusader or the Hellion.
Good luck!