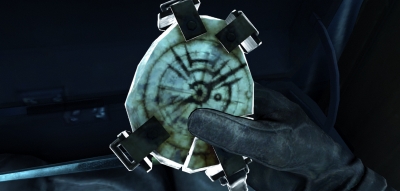
Safes in the game are locked chests with a combination lock. To open a safe you have to insert a correct combination of 3 numbers. Normally all codes you can find during the game, but sometimes it can be too difficult. Safes in the game always have one stable combination. Only one safe can change its code in different games.
In this guide, we will describe all available codes for Dishonored and its DLC.
Original game, mission 1, safe 1
This safe is located in the system of pipelines past the place where you get your gear. The code for it you can reveal on the shelf full of bottles behind this place.
Combination: 4-5-1.
Original game, mission 2, safe 2
This safe can be found in the apartments of Doctor Galvani. Proceed to middle floor to find it. The code for it is in Doctor’s journal and on his chalkboard as well.
Combination: 2-8-7.
Original game, mission 2, locked door
Codes protect not only safes but doors as well. This door you can find in the kennel located in the headquarters of Overseers. The code for it lies in the cell with dead prisoners.
Combination: 2-1-7.
Original game, mission 2, safe 3
This safe you will find in the Back Yard of Overseers. There are a lot of ways to get the combo. Look for it in the alley, read a note in the hall or look under the bed in the room with this safe. You can also overhear guards in the Back Yard.
Combination: 2-0-3.
Original game, mission 3, safe 4
This safe has randomly generated codes. You will find it in the house of Art Dealer. To get an achievement unlock it before you meet Slackjaw. For it protect the woman in the alley or simply teleport to the balcony. Try all combos, one will be correct for sure.
Combinations: 8-7-9 or 1-3-8 or 6-5-6 or 6-7-9 or 6-9-6 or 3-2-7 or 1-6-7.
Original game, mission 4, safe 5
That safe is located in the apartments of Pratchett in the second area. Enter the building with teleport and proceed to the upper floor. Numbers of the combo are located on paintings here.
Combination: 4-7-3.
Original game, mission 4, safe 6
You can find the picture-safe on the destroyed house near the residence of Sokolov. There are prisoners inside and they can give you the code if you help them to escape.
Combination: 2-9-4.
Original game, mission 6, safe 7
The safe of Lord Regent is located in his colored bedroom in the tower. You can discover the clue in the broadcast station where an officer will give it to you.
Combination: 9-3-5.
Original game, mission 7, safe 8
This safe can be found underwater at the start of the second map of the mission. Dive from the wooden bridge at the place where bubbles are seen. Follow the stairs and dive into the destroyed building. The code you can find in another abandoned house.
Combination: 4-2-8.
Original game, mission 7, safe 9
The last safe of the original game is located in pipes of Old Port. You can easily find it using your Heart as it has a Bone Charm. The code is in the book near the safe.
Combination: 5-2-8.
DLC 2, mission 1, safe 1
This safe changes the combo every time. It is located in the house of guards. Purchase the favor to find it easily and reveal the code on the wall of slaughterhouse. If you didn’t purchase the favor you should look for a note under the boat near the yard.
Combinations: 3-8-7 or 8-7-2 or 7-2-8 or 6-8-2 or 1-2-8 or 5-7-3 or 4-4-5 or 3-8-5 or 5-2-9 or 9-2-8.
DLC 2, mission 1, safe 2
This safe is located in the building of Rothwild. You may find the code in the report about injuries. Or just use our code, it works.
Combination: 5-1-2.
DLC 3, mission 2, locked door
You can find this door under the mill. Proceed here through the mill’s basement or through pipes. The combo can be granted by a nurse or Mortimer Hat. You can also find numbers in a note in the apartments of Pete.
Combinations: 1-6-5 or 2-3-8 or 3-8-7 or 4-0-8 or 5-7-2 or 6-6-9 or 7-7-4 or 8-3-7 or 8-7-3 or 9-8-4.