Fallout 3 is a quite long game which takes from 20 to 70 hours average. There are 14 main quests including 3 tutorials and 2 parallel missions of which the only one can be completed. Side and repeatable tasks raise this number to 59. Additional content offers 35 extra quests. It’s quite a few! So far as we are not going to load you with information about all quests, there will be only main ones. For additional missions check our article «Fallout 3: All Quests».
Each paragraph of this walkthrough provides a detailed step-by-step guide for the self-titled quest. There is an option to skip some tasks and we will note it separately. You should know that all missions up to Tranquility Lane can be skipped by reaching Vault 112 immediately. Also, finding the Citadel takes you to Picking Up the Trail at once. Such move will cause a lot of bugs and glitches, we don’t recommend doing so.
Let’s start with 3 tutorial missions!
Baby Steps
The first real mission follows the prologue in which you should choose your character’s name and appearance. After that, the time accelerates and Baby Steps starts. Playing as an infant you are able to explore the world out the playpen. Leave it, learn how to use items, and how to jump until your Dad is away. After that, simply follow this man after returning.
What’s more interesting, you can define primary statistics of the hero. Grab the «You’re SPECIAL!» near the toy box and invest available points. You can change your mind on the last page, as well. Remember that all attributes and skills along with appearance, name, and sex can be changed before leaving Vault 101.
Rewards: increased S.P.E.C.I.A.L. attributes.
Growing Up Fast
The time accelerates and you find yourself on the party. That’s your birthday, congratulations! Pay attention to other guests after receiving the brand-new Pip-Boy. It’s necessary to talk with Amata and Old Lady Palmer, they give you the comic book and the sweetroll. If you want more, interact with Stanley and Beatrice to receive the kid’s baseball cap and «A birthday poem». Further events are scripted, so relax and enjoy.
Once you are done with gifts leave this room and follow James, i.e. the Dad. Proceed to reactor room downstairs where Jonas and Dad will grant you a BB gun. Yeah, that’s the first real weapon! Use it to destroy training targets and a suddenly appeared radroach. Then simply follow instructions on the screen. Don’t forget to activate your Pip-Boy and discover its features as this device is the absolutely valuable item.
Rewards: Pip-Boy 3000, the comic book, the sweetroll, BB gun with ammo. Optional rewards: the kid’s baseball cap and «A birthday poem».
Future Imperfect
Here we have another time shift. You are ready to pass the G.O.A.T., this exam will define your future role in Vault 101. Talk with James about it, leave the room but don’t forget to collect the bobblehead «Medicine» which increases the self-titled skill by 10 points.
Near the classroom meet your old friend Amata being threatened by Butch and his mates. Different solutions of this task are available:
- Pass the Speech test to scare off Butch and earn good karma.
- Pass the Speech test to scare off Butch’s mates and earn good karma
- Fight your opponents to earn even more karma.
- Tell Butch to continue provoking Amata that will grant you evil karma.
- Ignore the situation with no change of karma.
Be careful as here your future karma alignment is determined. Decide whether you want to turn into a nice man, neutral judge or evil outlaw.
Continue to the classroom where Mr. Botch is. Talk to the teacher to start the test and select tag skills with immediate receiving additional 15 points for each chosen feature. It’s the only option which will grant you the related achievement. Otherwise, you can skip the G.O.A.T. and ask Mr. Botch to select abilities on his own. No matter what you will choose skills can be changed before leaving the vault. Leave the classroom to end this quest.
Rewards: chosen tag skills.
Escape!
It’s the first real main quest, not the tutorial one. Things become mad. Your Dad left the vault, the Overseer ordered to kill Jonas and catch you, radroaches infest the vault, Amata tries to assist you to escape. Accept or refuse a 10mm pistol and exit from the room. Move through rooms and hallways where you have a chance to crawl past guards or kill them.
The first moral choice comes with Butch. He begs you to rescue his mother attacked by radroaches. You can perform several Speech checks, ignore Butch or help him. Follow your karma way but remember that helping usually gives you some valuables. You can kill Butch and search his body but, in this case, you cannot hire him as a companion later, as well.
Fallout 3 is the pretty simple game when it comes to navigating. So we will not guide you through each location in details as you can simply look at the map and find quest marks there. Well, now continue crawling through Vault 101 until you approach the room with Amata, her father, and the security officer. There you can do anything. Convince the Overseer to hand over the key or password, steal these items, kill everybody, whatever! But also remember about karma. The most efficient way is to pickpocket key or password, save Amata, and leave the room.
Finally, continue exploring and follow marks on your map. The goal now is to reach the vault’s main door. Use keys or password received from the Overseer to unlock his tunnel. Reach the exit where Amata waits. We highly recommend saving here to have a backup. Right before leaving Vault 101 you will be able to completely change everything about your hero including primary statistics, tag skills, appearance etc.
Rewards: 10mm pistol, 200 XP. Optional rewards: Tunnel Snake jacket, various loot.
Following His Footsteps
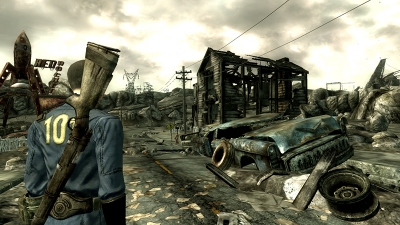
Welcome to the vast post-apocalyptic world! For now, your goal is to find the Dad. Note that almost every stage of this mission can be skipped, these options are listed below. However, we will shortly describe the quest with all its regular stages.
Navigate through the Wasteland and reach Megaton. There are many inhabitants and side quests but you are interested in your story. Find Moriarty’s Saloon where its owner can sell the information for 100 caps. After refusing he will raise this price to 300 caps. However, you can accept Colin’s offer and return caps from Silver. Choose from different ways to beat this side quest:
- Simply kill Silver without karma change.
- Convince Silver to return 300 or 40 caps and tell Colin she is gone.
- Tell Colin that Silver is gone without receiving caps from her but with positive karma.
- Take 400 caps of Silver and slay her with negative karma.
- Tell Colin that Silver is gone and slay her to gain loot without karma change.
Otherwise, you can steal info from Colin’s terminal. This will reduce the karma. Anyway, info about James requires you to reach Galaxy News Radio office. The way may be dangerous, so prepare carefully with good equipment and several consumables. Start your journey from the Super Duper Mart and reach the Potomac. Go south on the opposite side of this river to reach Farragut West Metro station. Deal with monsters there and proceed to another metro station where the «GNR Outpost» sign is. Leave the subway and go east to reach Chevy Chase with several paladins there.
Follow new mates and try to loot dead bodies as you want to find the powerful weapon called Fat Man. It will be useful to eliminate a giant super mutant near the GNR office. Deal with the monster, enter the building and interact with Three Dog, the GNR’s DJ. You are done with this particular mission.
Skipping options:
- Go straight to Three Dog without visiting Megaton.
- Take the Speech test to convince DJ in your loyalty and jump to Scientific Pursuits.
- Visit Madison Li in Rivet City and jump to Scientific Pursuits
- Find documents on the Jefferson Memorial and jump to Scientific Pursuits.
- Reach Vault 112 to detect James and jump to Tranquility Lane.
Rewards: actually, none but 300 XP. Optional rewards: various loot.
Galaxy News Radio
So far as your hero doesn’t want to skip any main quest or just cannot do it, the next task is to help Three Dog to restore the communication dish. Find two locations for it: the Museum of Technology and the Washington Monument. Both places are marked on your map, so we don’t find this task too complicated. Simply follow the markers and be aware of mutants and raiders on a surface as well as hostile guys in the metro.
Your task changes inside the Museum. Locate the lunar lander called Virgo II in the west sector of this location. Various mutants are everywhere, so you want to crawl past them as fighting may be too dangerous. Quickly take the dish and leave this place. The Washington Monument is directly west of your position and can be easily spotted. Go there to mount the device, return to the GNR office.
Rewards: info about James, 400 XP. Optional rewards: the key to Hamilton’s hideaway if you already were in Vault 112, various loot.
Scientific Pursuits
The next mission starts after interacting with Madison Li in Rivet City. Obviously, you can arrive there without visiting Megaton or finishing tasks for Three Dog. It may cause minor glitches, not as significant as ones after a direct journey to Vault 112.
Rivet City is a large beached aircraft carrier turned into the settlement. Probably, you have its marker on the map and can travel there. Otherwise, come back to Farragut West Metro station and go southeast following the river. Locate the Science lab and talk with Madison Li there. She will state that James traveled to the Jefferson Memorial. You know what to do.
Next place is right northwest of Rivet City. Reach it and find the Gift Shop there through which you can infiltrate. Locate the Rotunda with different tapes of which you should activate №10. This tape reveals the position of Vault 112 where the Dad probably is. Finally, reach the vault which is inside of Smith Casey’s Garage. Spend some time exploring Vault 112, take its jumpsuit from the security bot near the entrance and activate a tranquility lounger.
Rewards: additional info about your Dad, 500 XP. Optional rewards: various loot.
Tranquility Lane
After activating a lounger you will find yourself inside the virtual reality. As for us, it’s the scariest quest despite it features a pre-war reality. In a small town sometime in the 1950s, you will meet several locals, the dog who is actually James and Betty, i.e. insane Doctor Braun. Betty will force you to carry out her tasks from making the boy cry to killing everyone. Each bad action will reduce your karma.
There is a peaceful solution, however. Locate the neglected house and enter it. There are various items and the terminal. Your task is to activate 5 objects in this order: Radio, Pitcher, Gnome, Pitcher, Cinder Block, Gnome, Bottle. Each item has a unique tone and together they create the melody. This melody can be heard from Betty when she is playing. After correct activation, the terminal will appear and you can enable the Invasion. Despite everybody will be killed your karma rises as this action will free humans.
Regardless of the chosen quest solution, you can leave the Tranquility Lane at the end. In the peaceful ending of this mission, Doctor Braun will be prisoned inside his own simulation alone. Otherwise, every guinea-pig will be killed and Braun will continue his atrocities. Anyway, it’s your decision. In the real world, you can talk with James and come back to Rivet City.
Rewards: only 600 XP.
The Waters of Life
This mission is the longest and not as interesting as others. There is no option to skip it, although. Prepare carefully and free up as much space as you can. Then talk with James and Madison Li who want to restart Project Purity. For that, visit the Jefferson Memorial.
The first task requires from you only sufficient firepower. You must kill enemies, mainly super mutants, inside the location. Clean it and escort NPCs to the control hall. They will ask you for doing some dirty job:
- Turn off the pump.
- Change defective fuses.
- Drain pipes.
Complete these tasks only to face Enclave soldiers! Come back to allies fighting new enemies and spectate the dramatic scene where James saves Project Purity but kills himself with a huge dose of radiation. Further tasks are reduced to escaping from Enclave guys. You should escort several scientists including Doctor Li who knows how to reach the Citadel, the main base of paladins. Protect your temporary companions as their deaths are unwanted. Also, be sure to keep several stimpaks for injured followers.
Picking Up the Trail
We call it a rest mission as it includes only conversations and long walks. Doctor Li will lead you through underground corridors directly to the main base of Brotherhood. Explore it, talk with Elder Lyons, Paladin Gunny, and Scribe Rothchild. They can help you with following tasks:
- Permit to go inside the base. Owyn Lyons wants to see your hero, so don’t make him angry. After this dialogue, you can walk around the base freely.
- Ability to wear cool armor. Find Paladin Gunny next to the entrance afternoon. This impressive guy can teach the Power Armor Training perk. Yes, now you can use it!
- Information about a G.E.C.K. Talks with Rothchild in the lab to come at computers. Then visit the Citadel A Ring and activate the south terminal.
The last task is important to the story. Data from Scribe Rothchild and its terminals reveals positions of all vaults including Vault 87 where a G.E.C.K. is. To go on you must enter Little Lamplight, this city controlled by children. It would be much easier with the Child at Heart perk which adds special replies in dialogues with children. Otherwise, you have to be ready to complete another quest called Rescue from Paradise
During this mission, your main task is to free enslaved kids from Paradise Falls full of raiders. Normally, NPCs there are neutral to the protagonist, so you can finish this quest without fighting at all. Talk with kids and do what they want. You will need good Speech level, at least 50 Science or 40 Repair to unlock cages and peacefully remove guards. Killing anybody of slavers will turn entire location hostile, note that. After a successful escape, children will tell their mates in Little Lamplight to let you in.
Rewards: vaults’ locations, 800 XP. Optional rewards: cool armor, various loot.
Finding the Garden of Eden
Don’t rest at the entrance to Vault 87 is still hardly accessible. You have two ways:
- Enter the vault via Murder Pass full of super mutants.
- Unlock the vault’s door with the terminal which requires good hacking skills.
Inside you will find – surprise! – enemies and a lot of chests with cool loot. Also, there is a friendly super mutant called Fawkes. Unlock his cell using the fire alarm or the terminal with a high level of protection. Fawkes will help you with a G.E.C.K. as the device is located in the area with high radiation level. You know, super mutants are immune to radiation, so Fawkes is a priceless companion here. Sure, you can take a G.E.C.K. on your own using a lot of Rad-X and RadAway as well as a radiation suit.
Be sure not to bring any companion to Vault 87 or at least take away all valuables! Followers cannot escort you during the next quest because of Enclave soldiers’ attack. Just send companions home before entering the vault.
Rewards: 1000 XP. Optional rewards: various loot.
The American Dream
Finally, we are near the end. This mission is the last where you can stop and explore other parts of the Wasteland. Seriously, better stop after this if you have some unfinished side quests. Anyway, initially, you must escape from the Raven Rock, the main Enclave’s base. President Eden will lead you through the base as he wants to talk with you. Relax the 1st level where soldiers are neutral but be ready to fight further. Enter the Raven Rock control room only when you have found all valuable loot – look rewards section of this paragraph.
Interact with President Eden in his control room. This NPC is a huge computer based on a ZAX AI in fact. He will tell about his ambitious plans and ask for poisoning water with FEV. To leave the location you obligatorily must take the FEV but, sure, it’s not necessary to use this virus. Also, during dialogue with the President, you can force him to self-destruct. Such action requires 100 Speech or 60 Science or ZAX destruct sequence that can be found in Colonel Autumn’s apartments. Well, you still can simply leave the room without destroying Eden.
Outside the base, Fawkes will wait for you if he was liberated in Vault 87. Enjoy the scene now and don’t forget to save. The last main quest doesn’t allow you to complete side tasks or explore the world, remember that fact.
Rewards: during this quest, you will have an opportunity to pick up the bobblehead «Energy Weapons». Location of the item is described in out «Fallout 3: Bobbleheads Guide». Optional rewards: a lot of caps, cool armor and weapons, and so on.
Take it Back! / Project Impurity
To start this mission simply proceed to the Citadel and apply to Lyons. There will be a lot of paladins and soldiers as well as Liberty Prime, the giant robot! Follow Brotherhood team to the Jefferson Memorial. Liberty Prime can explode everything, just stay back. You can encounter several Enclave troops but they are much weaker than the protagonist now. Well, here is a real point of no return! There will be no the way back after you enter the Rotunda.
Inside you will find Colonel Autumn – kill him or convince to concede. Move further to reach Doctor Li. She will tell that the Project Purity is unstable and somebody has to repair it. The thing is that the reactor room is too dangerous due to a high level of radiation…
Here you will have several options:
- Sacrifice yourself to save the reactor. This leads to the most ironical good ending.
- Sacrifice Lyons. This leads to the neutral ending.
- Use the FEV to pollute water. This leads to the evil ending, i.e. Project Impurity quest.
- Sacrifice your companion which is immune to radiation. This leads to another neutral ending but you can select it only with Broken Steel DLC installed.
- Do nothing and destroy the reactor. This leads to the chaotic ending.
If you are playing without Broken Steel DLC then the credits will appear anyway. However, even with the installed add-on, you will face the final screen if the reactor was destroyed. In all other cases, the game will continue with DLC events. There you will fight with survived followers of Enclave. Literally, these quests are too easy and too plain compared with missions from the original game, so every experienced player will have no problems with them.
Rewards: 1200 XP. Optional rewards: positive or negative karma, various loot.
DLC quests
As we mentioned above, most quests from all add-ons are really simple. To start the story of related DLC you only have to install it and follow received directions. Messages with which you can start new quests are added to your Pip-Boy automatically. Have fun!