The game includes 9 missions set in different parts of Dunwall. You can pass quests both in lethal or non-lethal ways. Each playthrough is pretty unique as you reveal new hidden paths and can find valuable collectibles. The protagonist of this game named Corvo Attano is faced with intrigues of assassins who want to break the peace and conquer the kingdom. After the empress being slain your main goal is to protect her daughter and restore justice.
Each mission takes 1-1,5 hours from the beginning to the end. If you are using stealth strategy and looking for all items double this time. There is a tutorial mission which is quite short. It is designed to tell you first part of the story and train some skills. In this guide, we will cover all main missions without this intro. Also, we will not provide any clues, locations of collectibles or gameplay hints. For them check other guides.
As well, here you can face serious spoilers about the story. Don’t read this guide if you want to enjoy the plot without our hints.
Dishonored
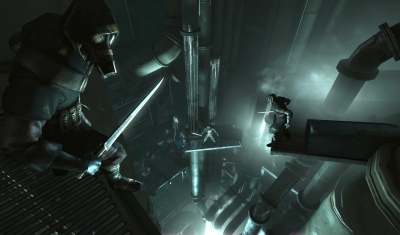
In the 1 mission, the protagonist will find himself in the prison. You are accused of killing the empress, but hidden friends help you to rescue. Make your way through the prison and enter sewers where weapons and equipment are. During this quest, you will face with mechanics of Dishonored. The main thing is that you can use lethal strategy and kill all foes or try to sneak to use stealth strategy. The second one is more challenging and valuable. Between missions, you will explore the Hound Pits Pub where your allies gathered.
There are no runes, shrines, bone charms, blueprints or paintings, but there is 1 safe.
High Overseer Campbell
In the 2 mission, your main goal is to slay Thaddeus Campbell who is a close ally of usurpers. The supernatural creature called the Outsider gave you special powers with which you can easier deal with foes. Speak with your allies and listen to their plan, explore the new home and start this mission. During it, Corvo will infiltrate the office of High Overseer and eliminate his target. It’s up to you what way to choose. A lethal method provides for killing Campbell when non-lethal one offers you to mark this person as a heretic.
There are 7 runes, 1 shrine, 5 bone charms, 3 blueprints and 1 painting as well as 2 safes.
House of Pleasure
In the 3 mission, the protagonist’s objective is to deal with supporters of Lord Regent and locate Emily Caldwin. Before this mission, you can explore sewers to get new runes and upgrade supernatural powers. During the mission, it’s highly suggested to complete all quests of Slackjaw as it strongly facilitates next playthrough. Once you reach the Golden Cat find Pendleton brothers and rescue Emily. If you have completed side quests before there will be a way of non-lethal elimination of brothers.
There are 5 runes, 5 bone charms, 2 blueprints and 3 paintings as well as 1 safe and no shrines.
The second part of the game as well as the first one offers several hidden treasures in all missions. Find valuable loot in safes with code protection. Unlike the previous part of the franchise in this game, you cannot just copy our combinations. The thing is that almost all codes are random. Means correct combination changes every time you start a certain mission. All clues in notes and other written documents are totally random. But some clues on paintings or walls are stable and you can discover them in our guide.
We suggest unlocking every safe because you will find cool loot inside. All codes normally are hidden near safes so you may test yourself and try to find them without our help. Or just read our guide where we reveal all locations of hidden boxes and combinations for them. Here we will cover both original game and a single DLC.
Original game, map 1, hidden place 1
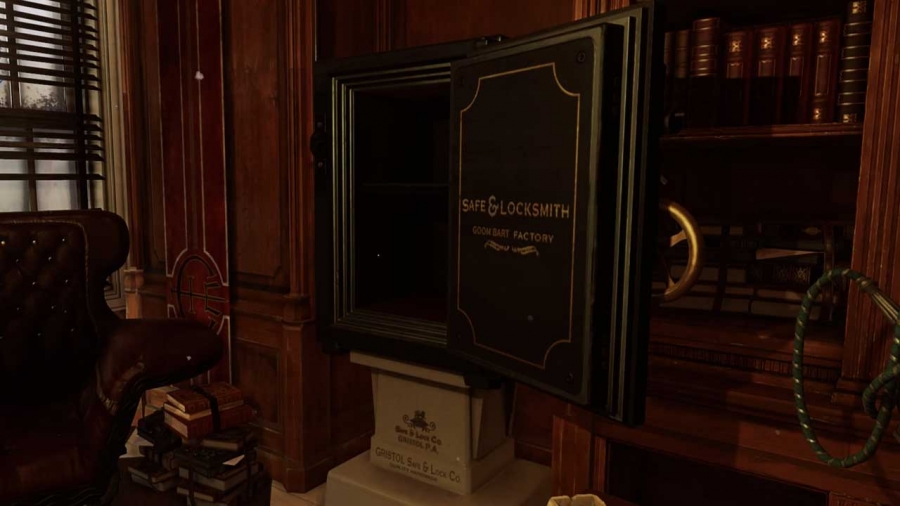
It is located in a new house of Doctor Galvani. Leave the castle and walk the boulevards till you see a big sign leftwards. Find a laboratory with box and a big picture inside. You should steal this picture and behind it is the correct code. Note that it is stable and it remains in every playthrough. If you don’t want to steal painting just copy our combo. Inside you will find billions and shells.
Clue: 4-5-1.
Loot: money and ammo.
Original game, map 2, hidden place 2
It is located in the outpost of Overseers. Enter there and go to the 3 floor. There is the box, the book named Seven Scriptures and guards in another room. Try to steal a note from a room with Overseers and come back to the previous room. In a note, there are titles of scriptures which you should remember. Then open the tome and search for numbers of described items. The resulting combo is the clue you are looking for!
Clue: random, but without numbers 0, 8 and 9 as well as without repeated numbers.
Loot: money, rune, and whalebone.
Original game, map 2, hidden place 3
The third box is in the Winslow Safe Shop at the final part of this mission. Be sure to check this building before completing the quest. Look for a big banner with Delilah Kaldwin. In the store near this banner is a big chest. You can find the combo for it on the cash machine. It’s a pretty simple challenge.
Clue: random.
Loot: money, ammo and bone charm.
Original game, map 3, hidden place 4
It is located in the basic location. From the entrance move rightwards and move to the 2 floor with teleportation. Then move along the hallway to the neglected room. Investigate this location and you will see two boxes near bodies. The closed one can be opened with the code, just find a document on the table.
Clue: random.
Loot: money, blueprint, and consumables.
Original game, map 3, hidden place 5
The fifth safe is your quest objective, but you still have to open it. When you face Doctor Hypatia explore nearby rooms. In one room you will find Doctor Vasco who lies in a bed. Jus speak with him and you will be awarded right combo. Also, you may steal a note from his pocket. The desirable chest is in the office of Doctor Vasco.
Clue: random.
Loot: quest items.
Original game, map 4, hidden place 6
Your main goal is to find the house of Correy Brockburn. Enter there with teleport or just on foot. Anyway, look for a certain office on the 1 floor. There are the box and the chalkboard in another room inside. Explore first numbers of code and guess remaining one. It’s not a bug, but a feature. There are always only 2 numbers.
Clue: random.
Loot: money and book.
Original game, map 4, hidden place 7
Well, it’s not the chest, but you still need the clue to open it. It’s also a part of the main quest so you will face it anyway. For the combo, you should enter the guard building near the carriage stop. Go to the upper floor of these apartments and look for a doc near one of the men. As you can understand, there are no treasures.
Clue: random.
Loot: none.
Original game, map 5, hidden place 8
This safe is located in the abandoned hall in the garden. Go to the conservatory and turn around so this building is behind the back. Then look up and teleport to the balcony. In this location be ready to fight some infested monsters. The safe is guarded by the witch. You also want to find the combo in the shop. It costs 250 gold, but you can complete a task for a shopkeeper or simply steal a note with the combination.
Clue: random.
Loot: money and ammo.
Original game, map 6, hidden place 9
This door has one of the hardest codes in the game. You can skip it as it’s the only one way of competing for this mission, but it also will save a lot of time. Long story short, you have to find a solution for a complicated logic puzzle. Conditions are different in each playthrough, but your task is always to match women and their treasures. We cannot offer you the universal clue as this quest always has different text. Just use schemes for logic grid puzzles.
Clue: random.
Loot: none, but it let you skip a big part of this mission.
Original game, map 6, hidden place 10
Well, here we will speak about a door again. It’s the black market store where you can find various cool items. The black market is located on Valia Street. You should find the clue in the home of a shopkeeper. To enter this building you should destroy a wooden board which blocks the door. Once you inside proceed upstairs and find a document with the wedding date. Then check calendars besides and enter your code.
Clue: random, but the third number is 4.
Loot: none.
Original game, map 7, hidden place 11
For this chest, you must receive an ability of time traveling. Enter the Manor and look for Outsider in the music room. Learn this ability and then go to the locked boiler room. It is near the big main room. Now remember the algorithm: go to the door in the present – switch to the past – enter the premises – cremate the dog corpse – switch to the present – copy the code which is now free from insects – switch to the past – unlock the chest.
Clue: 2-3-8.
Loot: money, map and bone charm.
Original game, map 7, hidden place 12
Well, it’s the last door from the original game! You want to open the door to the previous location. Again, you will need an ability of time traveling. Acquire it, switch backward and move in the back gardens. There you should find an owner’s note with the correct combo. You can reveal the code only in the past, but the door can be opened now as well.
Clue: random, but the second number is 7.
Loot: none.
Original game, map 8, hidden place 13
Find the house of Carlos Marletto on the main street. This building is located near the store of Winslow Safe Company. You should find the key at the store to open the apartments or simply teleport there. It’s easy to find the combo as it is revealed by the picture of Carlos Marletto. The chest is near the picture.
Clue: 1-2-3.
Loot: money and weapon.
Original game, map 8, hidden place 14
Enter the Grand Palace and rise to the 2 floor. You must search for a room opposite the dining hall. There are the chest and a document that indicates a place of the clue. Rise to the 3 floor and enter the most right room there which is the Duke’s office. Look rightwards and notice two desks, you need a smaller of them. There is the combo you are looking for.
Clue: random.
Loot: money and rune.
Original game, map 9, hidden place 15
Do you remember the first chest? You can unlock it once more! Both location and combo for it are the same to the first point of our guide. But be careful as there is a trap with incendiary bolts now. Doctor Galvani is very angry at you for the previous breaking so he left this surprise. There is also a note in the chest with furious speech.
Clue: 4-5-1.
Loot: money.
DLC 1, map 1, hidden place 1
The first box here is located near the beginning. Enter the apartments of Robbie where you will notice the chest on the 2 floor. Notice the scoreboard here and look above it to find 3 columns of books. An amount of tomes in each pile is the combo you need. This solution is revealed by a note of bookkeeper from the fight club.
Clue: 4-5-1.
Loot: money and potion.
DLC 1, map 2, hidden place 2
This door leads to the store on the black market. You can unlock it from behind, but for this, you must enter the shop another way. You want to blink into this room through the hole. The code you will find on the chalkboard near the door. It’s a pretty strange challenge because you don’t need the clue once you are in the room.
Clue: random.
Loot: none.
DLC 1, map 2, hidden place 3
The office of Cristofer Jeorge offers you the safe, but it’s not suggested to break it. We recommend speaking with this journalist. He wants to blame Ivan Jacobi for murder. Just enter the office of a probable murderer and find the picture of an owl. Behind it, you will find the bottle with blood that Cristofer Jeorge is looking for. Carry the bottle and the combo is yours.
Clue: random.
Loot: money.
DLC 1, map 2, hidden place 4
Finally, in this location, you can unlock the safe in the apartments of Shan Yun. Move to the 3 floor where the chest is located. But it is locked with a voice so use the record instead of the code. For that goal use the player near the safe. All records are placed on the 2 floor. Be sure to disable electric floor or it will burn you.
Clue: audio.
Loot: money.
DLC 1, map 3, hidden places 5-7
This location contains a lot of bank cells with 3 of them in the Archives. The first chest belongs to Cristofer Jeorge. The combo for it you will find on the 3 floor in a doc near the desk. The second box is owned by Morgan Yu. The clue for it is an amount of money which he had at the beginning of a new life. This clue you can find in a contract linked to Morgan’s quest. The third cell is for Doctor Galvani. The code is a date of the most valuable date in Galvani’s life. You can find it in the Archives’ sleeping zone.
Clues: 3-7-9, 3-1-5, 2-8-7 respectively.
Loot: money.
DLC 1, map 3, hidden places 8-12
Also, in the bank, there is one big vault with 6 safes. But you have to unlock only 5 of them as the last is locked with keys, but not with codes. All combinations you can find in a storage room on the 3 floor. Numbers are represented by the Fibonacci sequence, but it’s pretty hard to reveal all codes. Luckily, we have them here.
Clues: 0-1-1, 2-3-5, 8-1-3, 4-5-5, 8-9-1 respectively. The 4 clue 2-1-3 you should skip.
Loot: money.
DLC 1, map 5, hidden place 13
Through this gate, you can proceed further without several fights. To unlock it enter the house near the gate and move to the upper floor. Crawl through the room to the office and look for document with the combo. That’s all, just come back and unlock the gate.
Clue: random.
Loot: none.
DLC 1, map 5, hidden place 14
The last chest of DLC you will find in the room of Malchiodi. To unlock this room move to the Void and find the key of cultist. Combo for the safe is encrypted with runes and related digits. Make the Mark of the Outsider with 3 runes and then you can reveal desirable numbers.
Clue: 9-6-2.
Loot: corrupt bone charm and dairy.